--000-- Important statement - Some of those who are calling themselves as my so-called friends on the basis of acquaintance which has happened in a short duration of past time, behaved with me in past in a manner which was crossing over the limits of friendship in that time, vexatious, objectionable even after the frequent admonitions given by me, so I do not consider them as my friends who crosses over the limits of friendship. So I am not duty-bound to publish or answer their comments which are given on any of my blogs, or to answer their email, or to accept their friend invite on any of the social website like facebook, or to answer their messages sent through the comment form on blog. So please take a kind note that if it will be found out that the abovementioned persons tried to contact with me directly or indirectly by any types of means mentioned before or through any other person by incuring him / her inbetween or by maknig fake profile through it or by any other means, through the blog or through any other medium or if it will be found out that they have done any type of act which is vexatious for me, then proper action will be taken on it. Also by all this incidence the decision is taken that the right of publishing all the suspicious seeming comments given on the blog and the right of answering any of the suspicious seeming messages coming through the comment form is reserved, readers please take a kind note of it. ----- 00000 ----- महत्त्वाचे निवेदन - भूतकाळातील थोडक्या कालावधीकरता झालेल्या माझ्या ओळखीच्या आधारावर स्वतःला माझे तथाकथित मित्र म्हणवून घेणार्‍या काही जणांनी पूर्वी मी वारंवार समज दिल्यानंतरही, माझ्याशी तत्कालीन पद्धतीच्या मैत्रीच्या मर्यादा ओलांडणारे, मनस्ताप देणारे, आक्षेपार्ह वर्तन केले, त्यामुळे अशा मैत्रीच्या मर्यादा ओलांडणार्‍यांना मी माझे मित्र मानत नाही. त्यामुळे माझ्या कोणत्याही ब्लॉगवर आलेल्या त्यांच्या कॉमेंट्स प्रकाशित करणे किंवा त्यांना उत्तर देणे, किंवा त्यांच्या इमेलला उत्तर देणे, किंवा त्यांच्या फेसबुकसारख्या कोणत्याही सोशल वेबसाईटवर आलेल्या फ्रेंड इन्व्हाईटला ऍक्सेप्ट करणे, किंवा त्यांनी ब्लॉगवरील कॉमेंट फॉर्मद्वारा पाठवलेल्या निरोपाला उत्तर देणे यासाठी मी बांधील नाही. त्यामुळे उपरोल्लेखित व्यक्तिंनी आधी उल्लेख केलेल्या कोणत्याही प्रकारे किंवा दुसर्‍या एखाद्या व्यक्तीला मध्ये घालून तिच्याद्वारे किंवा बनावट प्रोफाईल तयार करून त्याद्वारे किंवा इतर कोणत्याही प्रकारे, ब्लॉग किंवा इतर कोणत्याही माध्यमातून माझ्याशी प्रत्यक्ष वा अप्रत्यक्ष प्रकारे संपर्क साधण्याचा प्रयत्न केल्याचे आढळल्यास किंवा मला मनस्ताप होईल अशा प्रकारचे कोणतेही कृत्य त्यांनी केल्याचे आढळल्यास, त्यावर योग्य ती कारवाई करण्यात येईल याची कृपया नोंद घ्यावी. तसेच या सर्व प्रकारामुळे ब्लॉगवर आलेल्या संशयास्पद वाटणार्‍या सर्व कॉमेंट्स प्रकाशित करण्याचे आणि कॉमेंट्स फॉर्मद्वारे आलेल्या संशयास्पद वाटणार्‍या कोणत्याही निरोपाला उत्तर देण्याचे अधिकार राखून ठेवण्याचा निर्णय घेण्यात आला आहे, याची वाचकांनी कृपया नोंद घ्यावी. --000--
Showing posts with label Paper Quilling. Show all posts

Wednesday, December 16, 2015

Quilled Key Chain

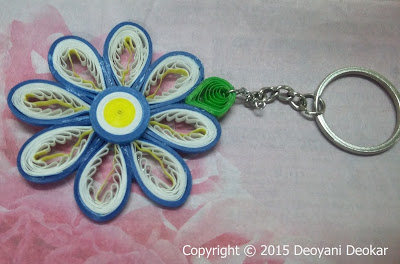
     Paper quilled key chain -

  
     Just after varnishing!

     This flower is made by using 3 mm paper strips and varnished with Camel Picture Varnish.
    

Sunday, July 19, 2015

Quilling Rangoli Around Thali

     I am writing this blog post to show you how I have used quilled designs in Rangoli. In India Rangoli is used for decoration at the time of festivals and other festive occasions. It is a tradition in India to decorate the Thali (Dish) with Rangoli while taking meal at festive occasions such as Marriage, Maunjibandhan etc. In Marriage the Rangolis around the Thalis of marrying couple are considered as necessary. Generally this Rangoli around thali is made by using pearl beads or decorated card board etc. But I have made these two Rangolis for the Marriage with a new quilled design, which is simple looking, as I didn't have enough time to do much quilling work.

     I have used theme of Indian Peacock for these two Rangolis. Both These Rangolis are having five parts with the same design, but there is only a slight difference of shade of green colour used in both Rangolis. Now you can see the photos of these two Rangolis.

The Close look of first Rangoli
   
Complete view of First Rangoli with increased brightness
  
Top part of Rangoli enlarged
  
Complete view of second Rangoli
  
Part of one side enlarged showing Peacock head and feather with other design
   
Both Rangolis arranged one below the other
   
     And after showing all these photos I want you to take a close look of Peacock's feathers, so have a look!

    
     I have made these Peacock feathers by using ten strips for single feather. All strips were having 5 mm size.
  • First Strip (Central Strip) - Dark blue
  • Second Strip - Slightly light blue
  • Third Strip - Very light bluish green
  • Fourth Strip - Greenish yellow shade of olive colour
  • Fifth Strip - Shade of green colour (I would have preferred yellowish green colour giving fluorescent appearance, but it was not available.)
  • Sixth Strip - Greenish yellow shade of olive colour
  • Seventh Strip - Greenish yellow shade of olive colour
  • Eighth Strip - Dark green colour
  • Ninth Strip - Dark green colour
  • Tenth Strip - Greenish yellow shade of olive colour used for making triangle below the blue eye of Peacock's feather.

That's All!

Monday, September 9, 2013

Ganesha And Quilling Decoration - Year 2013

     In my previous post I had shown my quilling project made for Ganesha Festival. Finally I decided to make a frame of my quilling decoration instead of applying sealent on it, because I wanted my work to remain unharmed for many years without any colour change in it.

     After pasting up all quillwork it became quite heavy and it was framed. It was a memorable experience doing all that.

     For the decoration saries are draped behind quilled frame and the Kundan Rangoli pieces are kept in front of Ganesha idol. While taking photographs I was unable to avoid reflection of camera flash in the glass of frame. I am not expert in photoshop, so I don't know how to remove that reflection. So I am just putting my photos here from different angles. Hope you like it!


     Wish you all who celebrates Ganesha Festival!

Saturday, July 27, 2013

Finally completed the Project!

     Last year one of my neighbour introduced me with the art of quilling just one and half month before Ganesha Festival. I was eager to learn quilling. I searched on the internet and got information. Then I decided to do the quilling patterned decoration behind Ganesha idol for Ganesha Festival.

     But in the nearby store only multicoloured quilling strips were available in a pack and those different colours were not sufficient for my decoration. So I decided to buy paper and cut the strips. But the papers in specific colour shades were not available in any store that time to whom I visited. So me and my family members searched in lot of stores and every time returned with some other colour's paper. In this way I got Red, Orange, Yellow, Green, Blue, Violet papers, so I decided to do the decoration in 7 colours of VIBGYOR. (Later on I got the shades which I wanted and I also used them in my decoration.)

     Cutting paper strips was tiresome work and my father helped me for that. While cutting papers I put those papers on newspaper and kept it on pad, so my pad got scratches of blade. Later on I found out about paper cutting mat and purchased it. My work was about to complete but due to some unfortunate events I had to stop my work suddenly.

     So after the last Ganesha festival I again started my work. This time I got some new shades, so I added them in my decoration and made some new flowers. But again due to the dust problem I stopped my work. Now in Rainy season  I started it again and finally completed the quilling part of it.

     Now I have two options, first is apply some waterproof coating on quill work and then paste it on thick cardboard with white background, and the second option is paste the quill work on some white backgronud paper and make a box frame of that design and use it as background.

     Now I have arranged these quilled flowers roughly on a blue cloth just to give an idea about the entire decoration. All this work is done by using 5 mm strips. Have a look on it.


     Thanks for viewing!
  

Tuesday, May 21, 2013

A pair of earrings, a flower, petal and leaf

     There is no post on my blog recently. There are two reasons, first there are loads of dust everyday at my place because of some construction work going on which stopped my quilling work and second I am not feeling well. So I hardly made some quilled things. Here are these things now. All these things are made up of 5 mm strips.

     First I made this pair of varnished earrings in shades of violet / purple. I was teaching the quilling technique to my aunt and I used the things she had made, in these simple looking earrings.


     Then I made this quilled Malaysian flower in shades of pink and violet. I wanted to use it for making brooch, but unfortunately brooch backs / pin backs / flat pads are not available in nearby store. So I just kept it as it is to use for some other thing.


     Here in this image I used a comb petal with this Malaysian flower. This comb petal is made by my aunt in shades of pink, violet and indigo.

  
     Then I used this shaded green leaf in combination with this Malaysian flower.

  
     This leaf is made using comb in two shades of green. This simple leaf is ideal for filling up large framework.

  
     That's all!

Thursday, February 14, 2013

Quilled Miniature - The Girl with flower bucket at Valentine Day!

     This is my first experiment of Quilled miniature making. As I had no idea about number of strips required for it, I guessed and took the strips and completed this miniature.

     I started quilling with 5 mm strips, so in this miniature doll I also used 5 mm strips. The total number of strips are as follows -
1) For the face and hairs - 8 + 8 = 16 strips
2) For the front hairs and bun and eyes = 1 strip 
3) For the upper part of the dress - 5 + 5 + 1 = 11 strips
4) For the lower part of the dress = 10 strips
5) For the hands of the dress - 4 + 4 = 8 strips
6) For the wrist and palms of doll - 3 + 3 = 6 strips
7) For the hat = 3 + 5 = 8 strips
8) For the heart = 1 strip
9) For the flower bucket - 2 + 1 = 3 strips
10) For the flowers = 3 strips
11) For the decoration in bucket, brooch on hat, Kumkum and lips etc. - leftover pieces of used strips

Total 67 strips + some leftover pieces are used and this girl in pink and pinkish purple outfit is made. Have a look on it in different angles!


*********
***
Wednesday, January 30, 2013

Paper Quilling Jewellery - My first try

     As I am new in paper quilling field, I am doing my experiments in paper quilling and learning the techniques. In last few days I made some Paper Quilling Jewellery.

     Some people apply a coat of varnish on paper quilling jewellery and some prefer to make it without applying varnish. I decided to make it by both the ways. I made 4 sets of earrings.


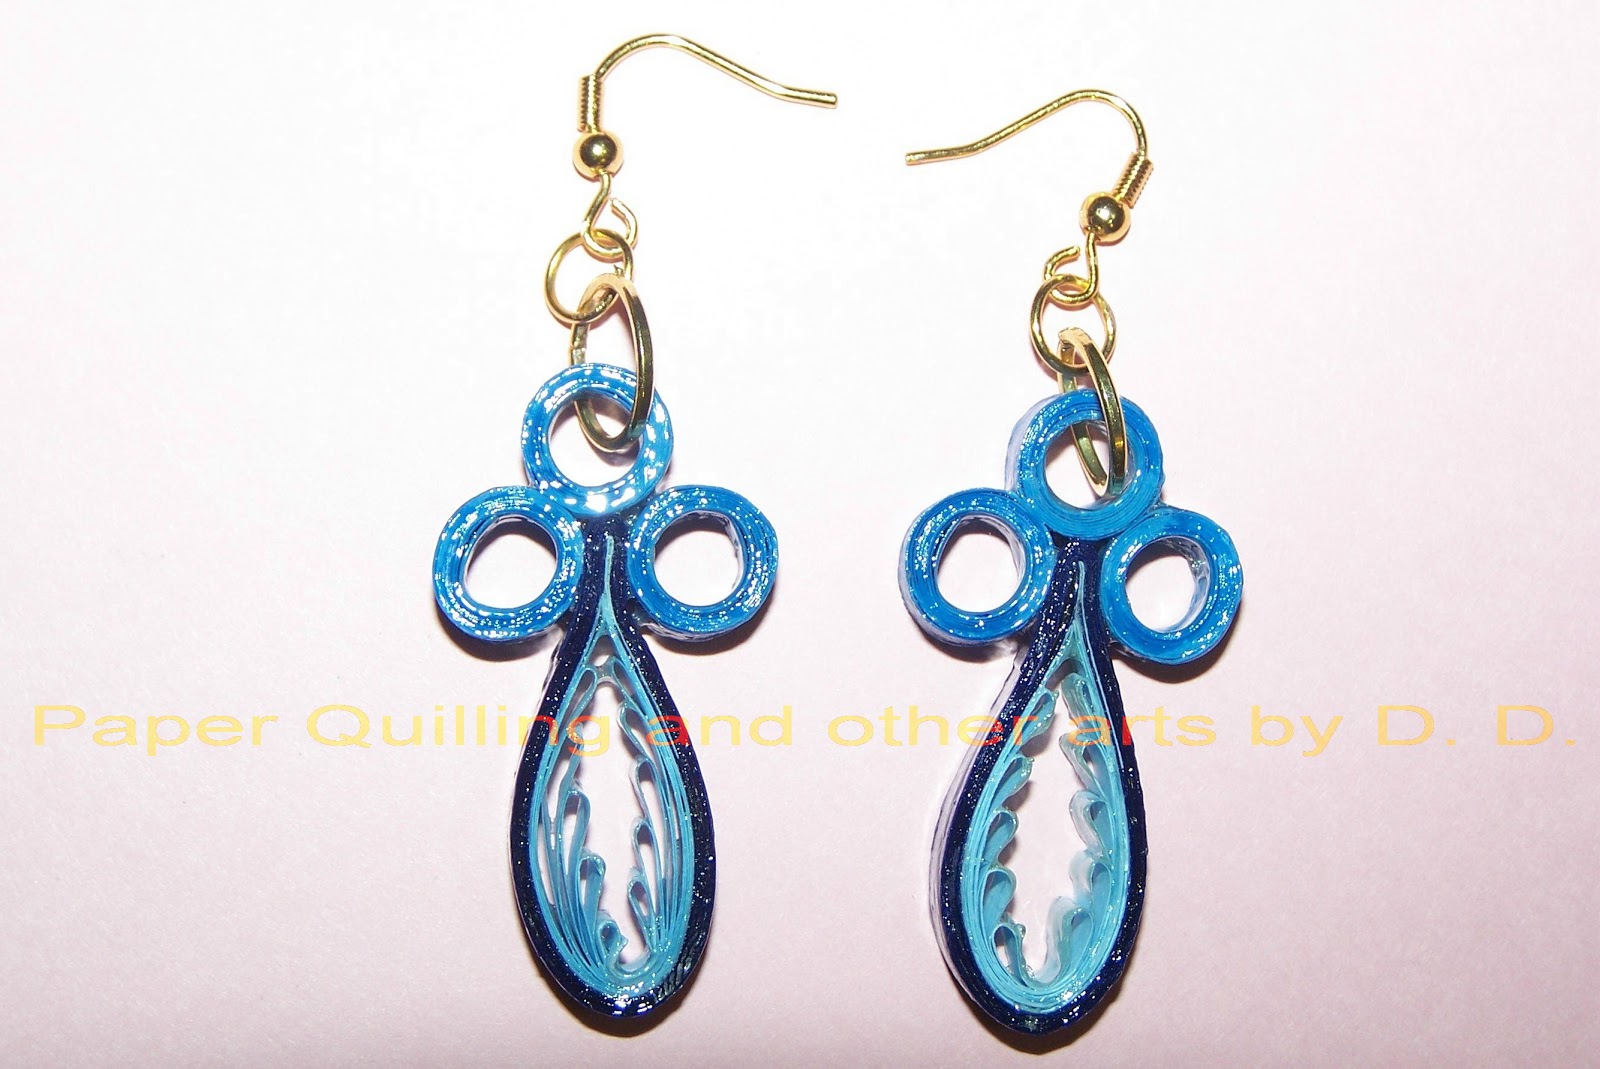
1. The first set is in shades of blue, done by comb technique with a strip in the middle and a coat of varnish applied on it.


2. The second set is also in shades of blue, done by comb technique but without any strip in the middle and a coat of varnish applied on it.

  
3. The third set is in shades of blue, bluish green and pale olive green, made using quilling tool rescembling an eye of peacock and a coat of varnish applied on it.

  
4. The fourth set is also in shades of blue, bluish green and pale olive green, made using quilling tool rescembling an eye of peacock, but without any varnish.

  
And here is a photo of all 4 sets together.

  
     Though paper quilled jewellery can be made in many colour shades, these items are quite delicate as compared to metal or plastic jewellery; Hence must be handled and ware carefully, to increase it's life.